
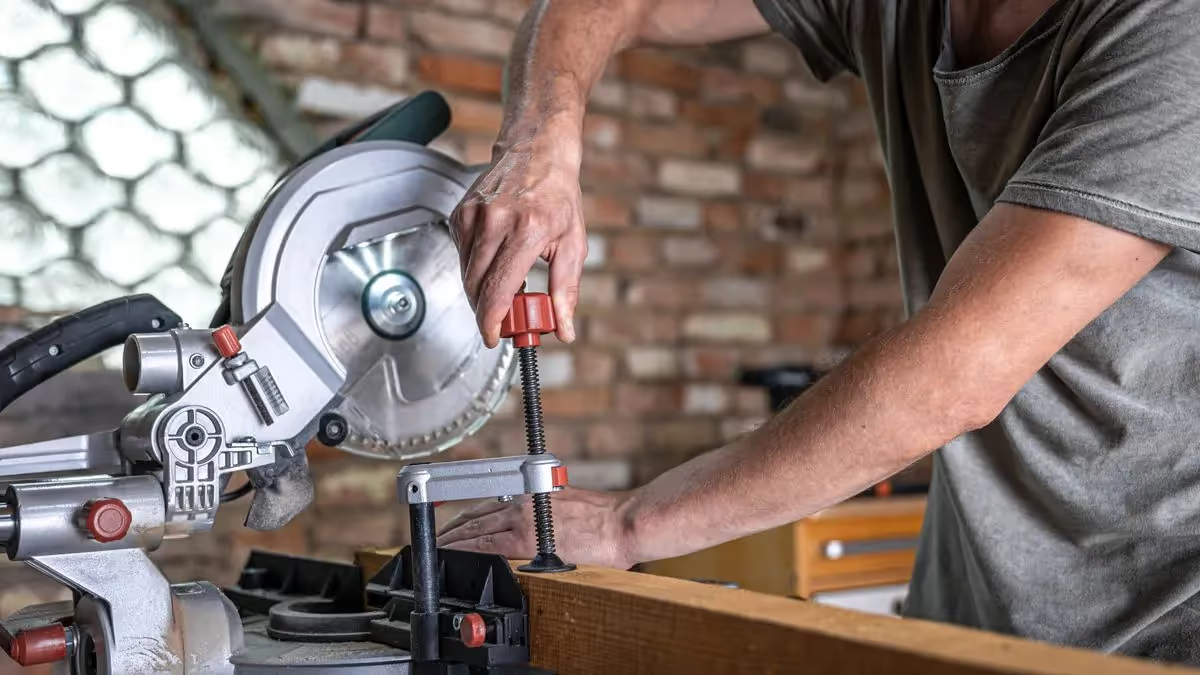
Here is the captivating world of the mitre saw: your ally for precise and creative angled cuts in a variety of materials. Discover how it works, its advantages and how to master this essential DIY tool."
Everything you need to know about mitre saws
Mitre saws are an essential tool for DIY and joinery enthusiasts. Their ability to make precise angled cuts in different materials such as wood, PVC and non-ferrous metals makes them indispensable allies for obtaining impeccable results. In this article, dive into the world of the mitre saw, discover its features and its advantages and learn how to choose it well for your DIY projects.
What is a mitre saw: precision and versatility at the service of DIY
The mitre saw, a true ally of DIY enthusiasts and craftspeople, is an essential tool for making precise angled cuts in different types of material. Whether wood, PVC or non-ferrous metals, this versatile tool offers unrivalled precision for impeccable results. Discover in detail what a mitre saw is, its key features and the fields in which it excels.
Anatomy of a mitre saw
A mitre saw is made up of several key elements that work in harmony to deliver highly precise cuts. Here are the main elements that make up this versatile tool:
1. Articulated arm
The articulated arm is a fundamental element of the mitre saw. It makes it possible to point the blade in different directions in order to make cuts at various angles. Thanks to this arm, the user can adjust the cutting angle precisely, guaranteeing clean, uniform results.
2. Cutting blade
The cutting blade is the heart of the mitre saw. Available in different types and sizes, the blade is designed to cut different materials precisely. The higher the number of teeth on the blade, the finer and neater the cut will be. There are also specific blades for materials such as wood, metal and plastic.
3. Cutting table
The cutting table is the surface on which the material to be cut rests. It is fitted with guides and angle stops to allow precise adjustments. A solid, stable base is essential to hold the saw in position during the cut, thereby guaranteeing safety and precision.
Versatility of the cuts
The mitre saw excels at making different types of cut, going beyond simple angled cuts. Here are the main cuts you can make with this tool:
1. Angled cuts
The angled cut is the most common application of the mitre saw. It consists of cutting a material along a precise angle, generally 45 degrees. This cut is ideal for joining pieces of wood or metal precisely, creating strong and attractive joints.
2. Bevel cuts
As well as angled cuts, the mitre saw can also make bevel cuts. This feature makes it possible to cut a material along an angle of inclination, thereby adding an extra dimension to your projects.
3. Straight cuts
Although straight cuts are not the speciality of the mitre saw, some models are fitted with devices for making precise straight cuts. This allows an even more versatile use of the tool.
Use in different fields
The mitre saw has its place in a variety of fields and projects. Here are a few examples of its use:
- Joinery: In the building of frames, furniture and other wooden projects, the mitre saw guarantees precise angled cuts for strong joints in birch wood, for example.
- Construction: The mitre saw is indispensable for making extremely precise cuts in the building of timber structures.
- Renovation: When renovating a home, the mitre saw makes it possible to create impeccable finishes on the pieces to be fitted.
- Craftwork: Artists and craftspeople use the mitre saw to create wooden frames for works of art and craft projects.
The mitre saw is far more than a simple cutting tool. It embodies precision, versatility and quality for all projects requiring precise angled cuts. Whether you are a seasoned DIY enthusiast or a professional craftsperson, this powerful tool will allow you to create perfect, long-lasting work. For impressive results and impeccable cuts, the mitre saw is the optimal choice.
The versatile usefulness of a mitre saw
Angled cuts to perfection
Mitre saws are designed to make precise, clean angled cuts. Whether you need to join pieces of wood for frames, to adjust angles in the building of structures, or to achieve impeccable finishes when renovating a home, a mitre saw will meet your needs. The cutting angle can vary between 0 and 90 degrees, which offers exceptional versatility for different types of project.
A multifunctional tool
The mitre saw is far more than a simple tool for angled cuts. It can also be used in fields such as metalwork, joinery and even masonry. Thanks to its robust design and its varied cutting capabilities, it becomes an invaluable ally for demanding craftspeople and DIY enthusiasts.
The different types of mitre saw
There are three main types of mitre saw on the market, each offering unique features for specific needs.
Manual mitre saw: simplicity and precision
The manual mitre saw is ideal for precision work. It has no electric motor, but its ergonomic design allows clean, precise cuts. Thanks to a mitre box, you can easily adjust the cutting angle and obtain satisfactory results.
Electric mitre saw: power and performance
The electric mitre saw is fitted with a motor that drives the blade for fast, precise cuts. With angle and depth adjustment options, this saw offers increased versatility for a variety of projects. Electric models come in a range of power ratings and performance levels to suit your specific needs.
Sliding mitre saw: maximum precision
The sliding mitre saw goes even further by adding a carriage that makes it possible to move the blade across the table, thereby offering precise lengthwise cuts. This feature also makes it possible to cut grooves and increases the cutting capacity in width.
How to choose your mitre saw well
When choosing a mitre saw, several criteria deserve your attention if you are to obtain the best results:
Motor power: optimum performance
The power of the motor plays a key role in the performance of the saw. Opt for a power rating between 1400 and 2000 W for efficient, effortless use.
Type of blade: suited to the material
The type of blade depends on the material you are going to cut. Make sure you use the right blade to obtain optimal results. The higher the number of teeth, the neater the finish will be.
Cutting width and height: versatility
The cutting capacity in terms of width and height determines the dimensions of the pieces you can work on. Check these parameters against your needs.
Comfort and precision
Modern mitre saws offer various options for improving the user experience. Extensions, clamps, laser guides and extraction systems all contribute to more comfortable and precise work. The mitre saw is an essential tool for any DIY enthusiast or craftsperson wanting to make precise, neat angled cuts. By selecting the type of saw suited to your needs and by paying attention to the criteria of power, blade and additional options, you will be equipped to carry out your projects successfully. For impeccable results and work of professional quality, the mitre saw is your best ally.
One form, several offers.
- Two minutes, no account
- Direct, no middleman
- Your identity stays private
How to use a mitre saw correctly
Step 1: prepare your work area
Step 2: set the cutting angle
Step 3: set the cutting depth
Step 4: position the material
Step 5: make the cut
Step 6: check the cut
Tips for perfect cuts
- Use measurement marks: Mark the material to be cut with precise indications so as to align the blade correctly.
- Use a laser guide: If your mitre saw is fitted with a laser guide, follow the beam of light for an even more precise cut.
- Maintain even pressure: Apply constant pressure on the material throughout the cut to avoid burrs.
- Change the blades according to the materials: Use specific blades according to the material you are cutting for optimal results.